

PiShot: Ultra High Speed Photography using $5 Cameras
![]()
PiShot allows capturing high-speed strobe images using the Raspberry Pi Camera.
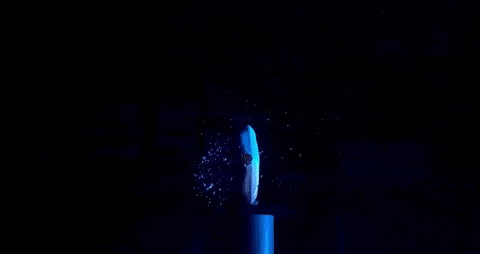
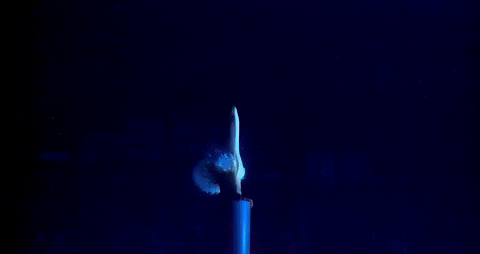
Bullet going through a Bar of Soap

Overview
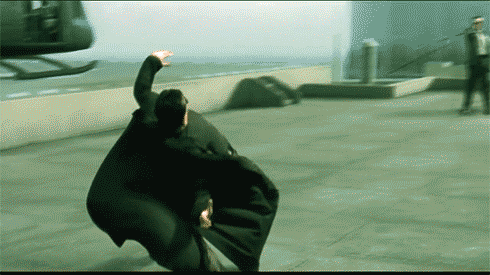
The inspiration for this effect is from the original Matrix movie,
Traditionally this effect is achieved by putting a bunch of super expensive cameras in a ring around the scene,
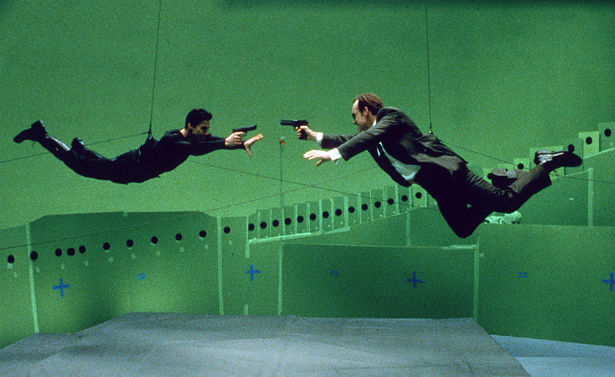
But this gets really expensive and doesn't scale well if you are using a $300 DSLR for every camera. PiShot makes use of a $5 Raspberry Pi and $5 Camera module to get a similar effect.
Our setup is shown below,

Challenges

-
The Pi camera modules (and any cheap camera really) have a rolling shutter instead of a global shutter. If we fire a strobe we'll only get a single row of pixels to be illuminated. PiShot allows operating the camera modules in a global shutter mode.
-
It's hard to operate 16 RaspberryPi's and trigger them at the same time. PiShot comes built-in with multiple Pi control and hostname discovery.
-
It's hard to make sure all cameras have the subject in the exact same location. PiShot has an onion skin feature which composes multiple camera images on top of each other to adjust where the cameras are looking.
Setup
Enable the camera using sudo raspi-config. Make sure that you can take an
image using raspistill -o test.jpeg.
Then, install dependencies,
sudo apt-get install wiringpi
pip install -r requirements.txt
Add dtparam=i2c_vc=on and the end of /boot/config.txt and i2c-dev to
/etc/modules-load.d/modules.conf.
Then reboot.
Build the project,
make all
And then run a quick test to make sure everything is working,
sudo python pishot.py --one -t 10
This will take a 10 second exposure and save all the frames to temp.264.
The first time you run this, it might not work, just try it again.
Note: The auto white balance makes the initial images really sad. Just wait for a minute before firing the strobe to get a better colored image.
Usage
Server Based
PiShot comes with a nice GUI to control each Raspberry Pi remotely, including hostname management, remote viewing and camera alignment tools.
Configure each Pi to run the following script on boot-up,
python server.py --secret SECRET
Replace SECRET with a long unrecognizable string. Make sure this secret is
consistent across all PI's and make sure we write it down.
Make sure your computer / laptop is on the same network as all the Pi devices you wish to remote control. To launch the GUI use the command,
python master.py --secret SECRET
Note that the SECRET here is the same secret that you used with all the Pi's.
GPIO Based
In the event that your Raspberry Pi's don't have networking access, you can trigger the Pi's by chaining their GPIOs.
Multiple Pi's can be daisy changed to open and close shutters at the same time. All slave Pi's run,
sudo python pishot.py --slave
And the master Pi runs,
sudo python pishot.py --master
The Pi's must be chained as follows, (all the grounds must be tied together!)
Master Pi's 23 --> Slave 1's 17
Slave 1's 23 --> Slave 2's 17
Slave n's 23 --> Slave (n+1)'s 17
.
.
.
Then, in the Master's prompt,
>> o
will open the shutter and,
>> c
will close the shutter.
Contributors
This work was done by Varun Mangalick, Kristin Sheridan, Candace Okumko and Shreyas Kapur as our final project for our class at MIT called 6.163: Strobe Project Lab.
The work was done under the supervision of Dr. James Bales, who is an absolute legend at helping us figure stuff out.
Thanks to HermannSW for his very detailed RaspberryPi forum posts, personal emails and communication to help us figure out the workings of the ov5647 camera module.
License
Copyright (c) 2019 Shreyas Kapur. Released under MIT License.